
The Honeywell T4 Pro Thermostat is an advanced, easy-to-use programmable device designed for efficient temperature control. It features an intuitive interface and smart home compatibility, optimizing energy usage.
1.1 Overview of the T4 Pro Thermostat
The Honeywell T4 Pro Thermostat is a programmable, energy-efficient device designed for precise temperature control. It offers a user-friendly interface, smart home integration, and compatibility with various HVAC systems. Its features include scheduling options, energy-saving modes, and remote access, making it a versatile choice for modern homes.
1.2 Importance of Proper Installation
Proper installation ensures optimal performance, efficiency, and safety. Incorrect wiring or setup can lead to malfunctions. Always check system compatibility and follow the manual’s guidelines. If unsure, consulting a professional is recommended to avoid issues and maintain warranty validity.

Pre-Installation Requirements
Verify system compatibility with your HVAC setup. Gather essential tools and materials. Review the manual thoroughly. Ensure power is off during installation. Consider professional help if unsure.
2.1 Checking System Compatibility
Verify your HVAC system type and wiring compatibility with the T4 Pro. Ensure the thermostat supports your system’s voltage and configuration. Check for any specific requirements in the user manual. Confirm that the T4 Pro’s universal mounting system aligns with your existing setup. Contact Honeywell support if unsure about compatibility.
2.2 Gathering Necessary Tools and Materials
To install the T4 Pro, gather essential tools: a screwdriver, wire strippers, drill, and wall anchors. Ensure you have the thermostat unit, base plate, and optional cover plate. Retrieve the user manual and any additional materials provided. Verify all components are included before starting the installation process.
Step-by-Step Installation Guide
Follow detailed instructions to prepare, mount, and connect wires to the thermostat. Power on and test functionality to ensure proper operation.
3.1 Preparing the Thermostat for Installation
Before installation, ensure the power to your HVAC system is turned off. Remove any existing thermostat and batteries. Review the user manual for specific preparation steps. Check for compatibility and ensure all necessary tools are ready. Prepare the mounting plate and wiring for a smooth installation process.
3.2 Mounting the Thermostat on the Wall
Ensure the power is off. Position the wall plate on a level surface and mark the screw holes. Drill pilot holes if necessary. Secure the wall plate with screws. Attach the thermostat to the wall plate, ensuring it clicks into place. This ensures proper alignment and secure installation for optimal performance.
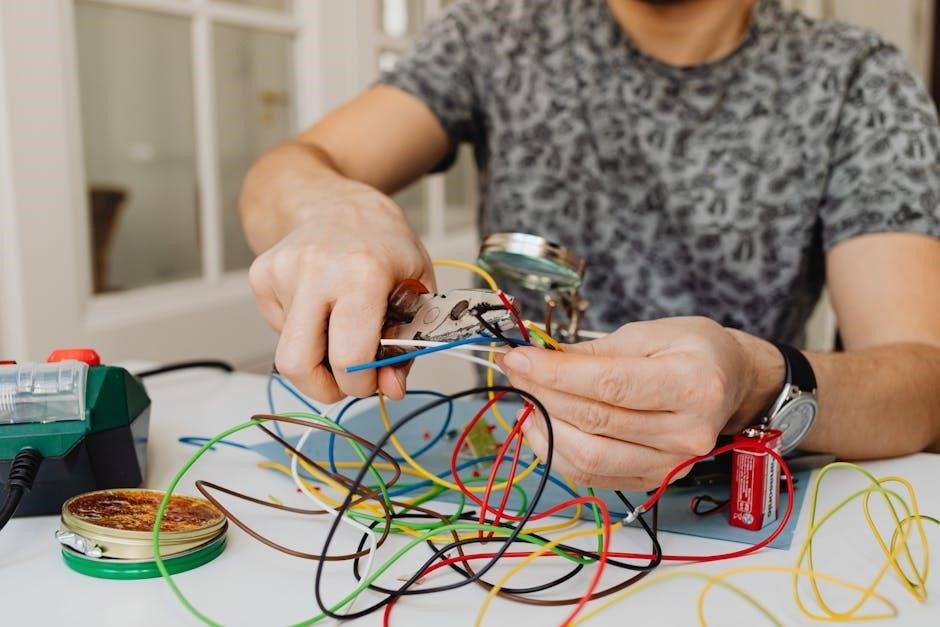
3.3 Connecting the Wires to the Thermostat
Identify the wires by their color codes and match them to the corresponding terminals on the thermostat. Ensure secure connections to avoid loose wires. Refer to the user manual for specific terminal labels and compatibility guidance. Proper wiring ensures reliable operation and prevents potential malfunctions.
3.4 Finalizing the Installation and Powering On
Turn the power on at the circuit breaker and check the thermostat’s display for proper functionality. Ensure all wires are securely connected and verify heating or cooling operation. Confirm the system cycles correctly, then proceed to program your desired temperature settings for optimal performance.
Wiring and Connectivity
Ensure correct wiring connections by matching wire colors to terminal labels. Verify system compatibility and secure all connections to avoid malfunctions and ensure proper thermostat operation.
4.1 Understanding Wire Color Codes
Understanding wire color codes is crucial for correct installation. Typically, R (red) is power, W (white) for heat, Y/Y2 (yellow) for cooling, G (green) for fan, C (common), and Rh (heat pump). Always refer to your system’s wiring diagram to ensure proper connections, as incorrect wiring can lead to malfunctions or safety hazards. If unsure, consult the manual or a professional.
4.2 Common Wiring Issues and Solutions
Common wiring issues include loose connections, incorrect wire assignments, or damaged wires. Solutions involve tightening connections, verifying wire placement against the manual, and ensuring all terminals are secure. If issues persist, check for compatibility with your HVAC system or consult a professional to avoid further complications and ensure safe operation.
Programming and Setup
Programming the T4 Pro involves navigating the menu to set temperature schedules and exploring advanced features for customized comfort and energy efficiency, ensuring optimal performance and convenience.
5.1 Navigating the Thermostat Menu
The T4 Pro menu is user-friendly, with clear on-screen instructions. Use the Select button to choose options and arrow keys to adjust settings. Access scheduling, energy-saving modes, and system preferences through intuitive prompts, ensuring easy customization of your temperature control experience.
5.2 Setting Up Temperature Schedules
Use the on-screen menu to create custom temperature schedules. Set specific temps for different times of the day and days of the week. The Select button navigates options, while arrows adjust values. This feature optimizes energy use and ensures comfort by automating your heating and cooling preferences according to your lifestyle.
5.3 Advanced Programming Features
The T4 Pro offers advanced features like energy-saving modes and smart home integration. Use the on-screen menu to enable settings that optimize performance. The Select button and arrow keys allow customization of Vacation Mode, Smart Response, and energy-use tracking, ensuring enhanced comfort and efficiency tailored to your needs and preferences.

Troubleshooting Common Issues
Check circuit breakers, ensure the furnace door is closed, and verify battery installation. Address connectivity issues by restarting the thermostat or checking wire connections for damage or misalignment.
6.1 Identifying and Resolving Power Issues
Check circuit breakers and ensure the power switch for your heating/cooling system is on. Verify battery installation if applicable. Restart the thermostat and ensure proper wiring connections. If issues persist, consult the user manual for detailed troubleshooting steps or contact Honeywell support for assistance.
6.2 Fixing Connectivity and Display Problems
Restart the thermostat and ensure proper power supply. Check for loose wire connections and clean the display screen. Verify Wi-Fi settings if smart features are affected. Consult the user manual for reset procedures or contact Honeywell support for further assistance with connectivity or display malfunctions.
6.3 Addressing Temperature Control Malfunctions
Check circuit breakers and ensure the power switch is on. Verify the furnace door is closed and batteries are properly installed. Reset the thermostat by removing batteries or cycling power. If issues persist, consult the user manual or contact Honeywell support for further troubleshooting or potential software updates.
Maintenance and Upkeep
Regularly clean the thermostat to prevent dust buildup. Check battery levels and replace as needed. Ensure software updates are installed for optimal performance and functionality.
7.1 Cleaning the Thermostat
Regular cleaning ensures optimal performance. Gently wipe the display and surface with a soft, dry cloth. Avoid harsh chemicals or liquids, as they may damage the device. For tough stains, lightly dampen the cloth but ensure no moisture enters the thermostat. Cleaning helps maintain accuracy and extends the product’s lifespan.
7.2 Replacing Batteries (if applicable)
To replace the batteries in your Honeywell T4 Pro Thermostat, first ensure the system is powered off. Locate the battery compartment, typically on the back or inside the unit. Open it carefully, usually by sliding or unscrewing the cover. Remove the old batteries and insert the new ones, matching the recommended type and orientation. Replace the compartment and turn the power back on. Test the thermostat to confirm proper function. Always use the correct battery type to avoid damage, and consider keeping spares for future replacements to maintain uninterrupted operation.
7.3 Regular Software Updates
Regular software updates are crucial for maintaining optimal performance and security of your Honeywell T4 Pro Thermostat. Check for updates via the thermostat menu or through the Honeywell Home app. Follow on-screen instructions to download and install updates. Updating ensures you have the latest features, bug fixes, and compatibility improvements. Stay connected for a seamless experience.

Frequently Asked Questions
Users often ask about installation challenges, programming temperature schedules, and thermostat compatibility. These FAQs address common concerns to ensure smooth setup and operation of the T4 Pro.
8.1 Can I Install the T4 Pro Myself?
Yes, the Honeywell T4 Pro can be installed by a homeowner with basic DIY skills. Ensure you have the correct tools and follow the manual carefully. If unsure about wiring or compatibility, consulting a professional is recommended to avoid errors and ensure safety.
8.2 How Do I Program the Temperature Schedule?
Access the menu by pressing the “Menu” button, then navigate to “Schedule” using the navigation arrows. Select the desired program options, set your preferred temperatures for different times of the day, and save your settings. Refer to the user manual for detailed step-by-step instructions and tips for optimal scheduling.
8.3 What If My Thermostat Isn’t Turning On?
If your T4 Pro Thermostat isn’t turning on, check the circuit breaker or fuse box to ensure power is restored. Verify that the HVAC system switch is in the “on” position. Ensure the furnace door is securely closed and that fresh batteries are correctly installed if applicable. If issues persist, consult the user manual or contact Honeywell support.

Honeywell Support and Resources
Honeywell offers comprehensive support, including downloadable user manuals, toll-free customer care, and a network of professional installers to assist with T4 Pro installation and troubleshooting needs.
9.1 Accessing the User Manual
The Honeywell T4 Pro user manual is accessible via their official website, providing detailed installation instructions, wiring diagrams, and troubleshooting guides. Users can download the PDF version from the Honeywell Home website, ensuring easy access to setup and maintenance information.
9.2 Contacting Customer Support
For assistance, contact Honeywell Customer Care via their toll-free number or live chat on the official website. Support agents are available to help with troubleshooting, installation, and warranty inquiries, ensuring comprehensive assistance for T4 Pro users. Additional support resources are also accessible online.
9.3 Finding Professional Installers
For users who prefer professional installation, Honeywell offers a “Find a Pro” option on their website. This service connects customers with certified installers in their area, ensuring a smooth and correct setup. Contacting Honeywell support can also provide additional guidance and recommendations for local professionals, ensuring your T4 Pro is installed correctly and functions optimally for a hassle-free experience.
Advanced Features and Customization
The Honeywell T4 Pro offers smart home integration, energy-saving modes, and customizable display settings. Users can tailor temperature schedules and energy usage preferences for optimal comfort and efficiency.
10.1 Smart Home Integration
The Honeywell T4 Pro Thermostat seamlessly integrates with smart home systems like Amazon Alexa and Google Assistant. Voice control and remote access via smartphone apps enhance convenience. Geofencing and smart scheduling optimize energy use based on your location and preferences, ensuring efficient heating and cooling tailored to your lifestyle.
10.2 Energy-Saving Settings
The Honeywell T4 Pro Thermostat offers advanced energy-saving features, including programmable schedules and energy-saving mode. Smart recovery optimizes heating/cooling cycles, while geofencing adjusts settings based on your location. These settings help reduce energy consumption without compromising comfort, ensuring efficient and cost-effective temperature control year-round.
10.3 Customizing the Display
The Honeywell T4 Pro Thermostat allows users to customize the display to suit their preferences. Adjust brightness levels, choose from multiple color themes, and select clock formats. These options enhance user experience without compromising functionality, ensuring the thermostat blends seamlessly with any home decor while maintaining its advanced features.
The Honeywell T4 Pro Thermostat offers a seamless blend of simplicity and advanced features, ensuring efficient temperature control and energy savings. Its intuitive design and customization options make it a valuable addition to any home.
11.1 Final Tips for Optimal Performance
For optimal performance, ensure regular software updates, clean the display, and check wiring connections. Maintain consistent schedules and verify battery levels. Troubleshoot common issues promptly to avoid efficiency losses. Always refer to the user manual for specific guidance tailored to your system setup and needs.
11.2 Ensuring Long-Term Efficiency
Regularly update the thermostat software and clean the display to maintain performance. Check wiring connections and battery levels to prevent disruptions. Schedule periodic checks of temperature settings and system compatibility. Proper maintenance ensures consistent energy savings and reliable operation over time.