
Needlepoint stitches are a cornerstone of embroidery, offering artistic and functional ways to create intricate designs. PDF guides provide detailed patterns and tutorials for mastering these stitches, from basic to advanced techniques, ensuring versatility and precision in every project.
History and Evolution of Needlepoint
Needlepoint has a rich history, tracing back to ancient civilizations where stitching techniques were used for decorative and functional purposes. Over centuries, it evolved through various cultural influences, adapting to new materials and designs. The craft gained popularity in Europe during the Middle Ages, with intricate tapestries becoming symbols of wealth. Modern needlepoint has embraced a wide range of stitches, from simple to complex, making it accessible to crafters of all skill levels. Historical patterns and techniques are now widely shared through PDF guides, preserving the art while inspiring innovation. This evolution reflects the enduring appeal of needlepoint as a creative medium.
Importance of Stitches in Needlepoint
Stitches are the foundation of needlepoint, determining the texture, dimension, and overall aesthetic of a piece. Each stitch serves a specific purpose, from creating smooth surfaces to adding intricate details. The choice of stitch greatly impacts the visual and tactile qualities of the finished work. Proper stitch selection ensures durability and professional-grade results. PDF guides often emphasize the importance of mastering various stitches, offering step-by-step instructions to help crafters achieve precision and consistency. By understanding and applying the right stitches, needlepoint artists can bring their designs to life with depth and creativity, making each piece uniquely expressive.
Basic vs. Advanced Needlepoint Stitches

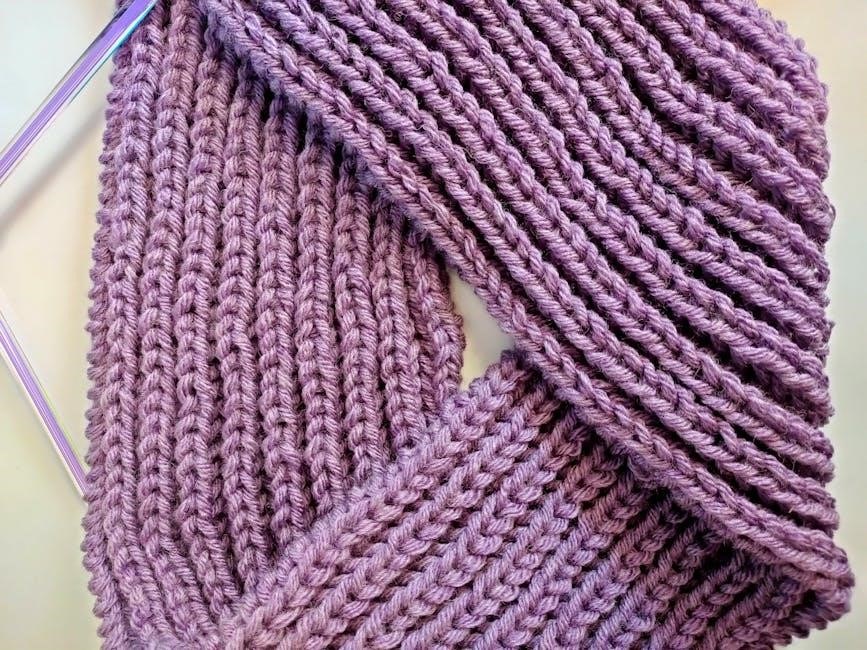
Basic stitches, like the Tent Stitch, are simple and ideal for beginners, while advanced stitches require more skill, offering intricate details and textures for experienced crafters.
Basic Stitches for Beginners
For those new to needlepoint, starting with basic stitches is essential. The Tent Stitch, Continental Stitch, and Slant Stitch are fundamental techniques that provide a smooth foundation. These stitches are simple, requiring minimal thread manipulation, and are ideal for covering large areas evenly. They teach the basic mechanics of needlepoint, such as maintaining consistent tension and proper thread coverage. PDF guides often include step-by-step visuals and instructions, making them invaluable resources for mastering these stitches. Practicing these basics builds the skills and confidence needed to progress to more complex designs and patterns in needlepoint embroidery.
Advanced Stitches for Experienced Crafters
Experienced crafters can elevate their needlepoint projects with advanced stitches like the broadcloth stitch, herringbone stitch, and brick stitch. These stitches add intricate textures and visual interest, perfect for detailed designs. They require precise thread control and a strong understanding of tension. Advanced stitches allow for greater creativity, enabling crafters to create layered, dimensional effects. PDF guides often feature tutorials and patterns for these stitches, offering step-by-step instructions to master their execution. Practicing advanced stitches opens up new possibilities for complex and visually stunning needlepoint pieces, making them a rewarding challenge for skilled embroiderers looking to expand their artistic repertoire.

Popular Needlepoint Stitches for Beginners
Beginners often start with simple yet versatile stitches like the tent stitch and continental stitch. These stitches are foundational, easy to learn, and perfect for covering canvas evenly, ensuring a smooth start to any needlepoint project with clear guidance from PDF tutorials.
Tent Stitch
The tent stitch is a fundamental needlepoint stitch, ideal for beginners. It involves inserting the needle in one corner of a canvas mesh square and bringing it out diagonally opposite, creating a slanting stitch. This stitch is excellent for covering large areas quickly and evenly, making it perfect for backgrounds and filling spaces. PDF guides often highlight the tent stitch for its simplicity and versatility, offering step-by-step instructions to master the technique. Proper tension is crucial to avoid puckering the canvas, ensuring a smooth and professional finish. This stitch is a great starting point for anyone new to needlepoint embroidery, providing a solid foundation for more complex stitches.
Continental Stitch
The Continental Stitch is another essential needlepoint stitch, known for its smooth and even texture. It works well for covering large areas and is particularly effective for creating backgrounds. When combined with the Tent Stitch, it enhances the overall design by providing depth and variety. PDF guides are excellent resources for learning this stitch, offering detailed step-by-step instructions and visual diagrams. These guides help crafters master the Continental Stitch, ensuring that their projects look professional and well-finished. By following the patterns and tips provided in these PDFs, needlepoint enthusiasts can achieve the desired texture and appearance for their embroidery projects, making it a versatile choice for various designs.

Choosing the Right Stitches for Your Project
Choosing the right stitches for your project is crucial for achieving desired texture and visual impact. PDF guides offer tips on selecting stitches that complement thread choice and design elements, ensuring a professional finish.
Considering Texture and Dimension
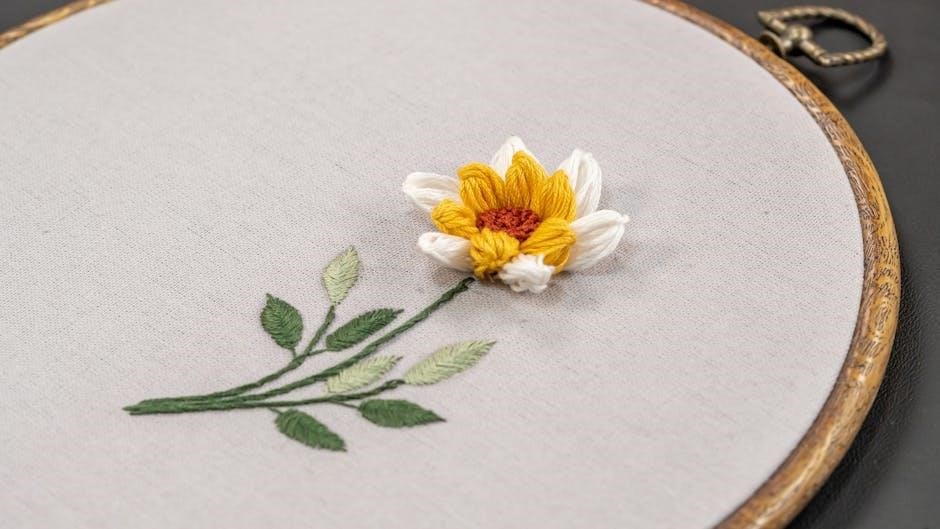
Texture and dimension are essential elements in needlepoint, enhancing the visual and tactile appeal of your work. PDF guides emphasize the importance of selecting stitches that mimic real-world textures, such as smooth surfaces or thick fabrics. For example, using a Tent Stitch creates a flat, even surface, while Continental Stitch adds depth with its slanted loops. Dimension can be achieved through layering or using thicker yarns. These techniques ensure your design feels as dynamic as it looks, making each stitch decision a deliberate choice to bring your project to life.
Selecting Threads and Yarns
Selecting the right threads and yarns is crucial for achieving the desired effect in needlepoint. PDF guides often highlight the variety of materials available, from cotton and wool to metallic and silk threads. Each yarn type offers unique texture and sheen, impacting the overall look of your stitches. For instance, metallic threads add shimmer, while wool provides warmth and durability. Consider the project’s purpose and design when choosing materials. Mixing yarns can also create dynamic contrasts, enhancing the visual interest of your work. Proper thread selection ensures your needlepoint piece is both functional and aesthetically pleasing, making it a true masterpiece.
Matching Stitches to Design Elements
Matching stitches to design elements ensures a cohesive and visually appealing needlepoint piece. Different stitches suit various parts of a design, such as backgrounds, outlines, and details. For example, the Tent Stitch is ideal for large areas, while the Continental Stitch adds texture to specific elements. PDF guides often provide charts and examples to help crafters choose the right stitches for flowers, leaves, or geometric patterns. Consider the texture and dimension you want to achieve, as certain stitches mimic real-world materials like fabric or wood. By aligning stitches with design elements, you create a balanced and professional-looking needlepoint project that reflects your artistic vision.

Common Mistakes to Avoid in Needlepoint
Avoiding common mistakes is crucial for achieving professional-looking needlepoint. Incorrect tension can distort the canvas, while poor stitch alignment disrupts the design. Using the wrong thread weight or stitch type can also detract from the final piece. PDF guides often highlight these pitfalls, offering tips to maintain even coverage and consistency. Proper preparation, such as prewashing fabric and using the right tools, further ensures a flawless outcome. By being mindful of these errors, crafters can create beautiful, long-lasting needlepoint projects that showcase their skill and creativity.
Incorrect Tension and Coverage
Incorrect tension and coverage are common pitfalls in needlepoint that can ruin the integrity of a piece. Tension issues occur when stitches are too tight or too loose, causing the canvas to pucker or sag. This not only distorts the design but also makes the piece uncomfortable to handle. Uneven coverage happens when stitches fail to completely cover the canvas threads, leaving gaps that weaken the fabric. Both problems can lead to thread damage and an unprofessional finish. PDF guides often emphasize the importance of maintaining consistent tension and full coverage to ensure a sturdy, even surface for stitching. Proper technique and regular monitoring are essential to avoid these mistakes and achieve a polished result.
Choosing the Wrong Stitch for the Design
Selecting the wrong stitch for a needlepoint design can undermine its aesthetic and structural integrity. PDF guides often highlight the importance of matching stitches to specific design elements, such as texture, detail, and scale. Using a stitch that is too dense or too sparse can obscure intricate patterns or create an uneven appearance. Additionally, some stitches are better suited for backgrounds, while others are ideal for detail work. Incorrect stitch selection can also lead to thread wastage or an unbalanced composition. By referring to needlepoint stitch guides, crafters can ensure they choose stitches that enhance their design, maintaining harmony and visual appeal throughout the project. Proper stitch selection is vital for achieving professional-looking results.
Resources for Learning Needlepoint Stitches
Free PDF guides and tutorials are excellent resources for mastering needlepoint stitches. These materials often include step-by-step instructions and visual aids to help learners of all skill levels.
Free PDF Guides and Tutorials
Free PDF guides are a valuable resource for learning needlepoint stitches. These guides often include detailed diagrams, step-by-step instructions, and tips for both beginners and experienced crafters. Many websites offer downloadable PDFs that cover a wide range of stitches, from basic tent and continental stitches to more complex variations. These resources are particularly useful for those who prefer visual learning or need a quick reference while working on a project. Additionally, some guides focus on specific techniques, such as thread selection and tension control, ensuring a polished finish. They are an excellent starting point for anyone looking to expand their stitching skills.
How to Create Your Own Stitch Guide
Creating your own needlepoint stitch guide is a rewarding project that allows for personalization and ease of use. Start by organizing stitches logically, grouping them by type or difficulty. Include clear diagrams and step-by-step instructions for each stitch, ensuring they are easy to follow. Add high-quality images to illustrate complex techniques. Personalize the guide by including your favorite stitches or those most relevant to your projects. Use design software to format the guide neatly, making it visually appealing. Save it as a PDF for convenient access. This tailored resource will enhance your needlepoint experience, providing a go-to reference for all your stitching needs.
Needlepoint stitches offer endless creativity and precision, transforming canvas into vibrant works of art. Whether you’re a beginner or an experienced crafter, mastering these stitches opens doors to unique designs and personalized projects. With resources like PDF guides readily available, learning and refining your technique has never been easier. Remember, the key to successful needlepoint lies in patience, practice, and choosing the right stitches for your vision. Embrace the meditative quality of stitching and enjoy the journey of creating something truly special. Happy stitching!