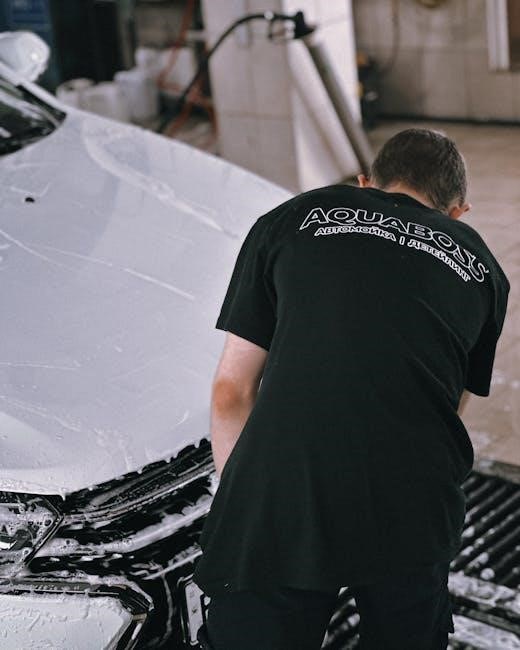
Auto detailing is a comprehensive process, exceeding a simple car wash, focusing on meticulous cleaning and restoration.
It’s about enhancing both the aesthetic appeal and protecting the vehicle’s value through expert techniques and premium products.
From paint correction to interior rejuvenation, detailing elevates your car’s condition to a showroom-quality finish, ensuring lasting brilliance.
Understanding the nuances of auto detailing empowers enthusiasts and professionals alike to achieve exceptional results, preserving automotive investments.
This guide will explore the essential aspects of auto detailing, offering insights into techniques and tools for a pristine vehicle.
Expert advice and services are available to cater to all car care needs, from basic washes to luxury treatments, ensuring optimal vehicle health.
What is Auto Detailing?
Auto detailing transcends a standard car wash, representing a meticulous and comprehensive process dedicated to the thorough cleaning, restoration, and protection of a vehicle’s condition.
It involves a deep dive into both the exterior and interior, addressing imperfections and enhancing the overall aesthetic appeal. Unlike a quick wash, detailing focuses on reviving faded paint, removing swirl marks, and meticulously cleaning every nook and cranny within the cabin.
This includes specialized techniques like paint correction, clay bar treatments, and the application of protective coatings such as waxes and sealants. Interior detailing encompasses vacuuming, upholstery cleaning, dashboard polishing, and window clarification.
Essentially, auto detailing aims to return a vehicle to its near-original, showroom-ready state, or even improve upon it, preserving its value and providing a lasting, pristine finish. It’s a commitment to automotive excellence, going beyond surface-level cleanliness.
It’s a craft that requires skill, patience, and the use of high-quality products.
Why is Auto Detailing Important?
Auto detailing is crucial for maintaining a vehicle’s value, appearance, and overall health. Regular detailing protects your investment by removing contaminants that can cause long-term damage, like acid rain, road salt, and UV rays.
Beyond aesthetics, detailing enhances safety. Clean windows and mirrors improve visibility, while a well-maintained interior minimizes distractions. Addressing minor paint imperfections prevents rust and corrosion, extending the vehicle’s lifespan.
A meticulously detailed car also makes a positive impression, reflecting pride of ownership. It contributes to a more enjoyable driving experience, fostering a sense of well-being.
Furthermore, professional detailing can identify potential mechanical issues early on, allowing for timely repairs. From engine oil changes to battery condition checks, a detailed inspection offers peace of mind.
Ultimately, auto detailing isn’t just about a clean car; it’s about preserving its longevity, safety, and value.
Exterior Detailing: A Step-by-Step Guide
Achieving a flawless exterior involves a systematic approach: pre-wash, wheel cleaning, two-bucket wash, soap application, rinsing, and careful drying techniques.
These steps ensure a spotless finish.
Pre-Wash and Rinse
The pre-wash stage is crucial for removing loose dirt and grime before the main wash, minimizing swirl marks and scratches. Begin with a thorough rinse using a high-pressure nozzle to dislodge surface contaminants like road salt, bird droppings, and dust.
Follow this with a pre-wash solution – a dedicated snow foam or citrus pre-cleaner – applied via a foam cannon. Allow the solution to dwell for several minutes, softening stubborn dirt. This dwell time is vital for effective cleaning.
Rinse again thoroughly, ensuring all traces of the pre-wash solution are removed. This initial rinse significantly reduces the risk of scratching during the contact wash phase. A proper pre-wash and rinse prepares the vehicle for a safer and more effective detailing process, protecting the paintwork.
This step is often overlooked, but it’s a cornerstone of professional detailing.
Wheel and Tire Cleaning
Wheel and tire cleaning demands specific attention, as these areas accumulate heavy brake dust and road grime. Begin by rinsing the wheels to remove loose debris. Then, apply a dedicated wheel cleaner – acid-based for severe contamination, or pH-neutral for sensitive finishes.
Allow the cleaner to dwell according to the product instructions, but avoid letting it dry. Use a wheel brush, with varying bristle stiffness, to agitate the cleaner and loosen embedded dirt. Don’t forget the tire sidewalls; a tire brush and tire cleaner will restore their blackness.
Rinse thoroughly, ensuring all cleaner residue is removed. Inspect for any remaining brake dust and repeat if necessary. Clean tires contribute significantly to the overall appearance of a detailed vehicle, enhancing its aesthetic appeal;
Proper wheel cleaning protects the finish and extends their lifespan.
The Two-Bucket Wash Method
The two-bucket wash method is a cornerstone of safe car washing, preventing swirl marks and scratches. Fill one bucket with car wash soap and water (the “wash” bucket), and the other with clean water (the “rinse” bucket). Always use a quality microfiber wash mitt.
Dip the mitt into the wash bucket, apply to a section of the car, and gently wash. Then, rinse the mitt thoroughly in the rinse bucket before returning it to the wash bucket. This traps dirt and grit in the rinse bucket, preventing re-application to the paint.
Repeat this process panel by panel, frequently changing the water in both buckets as it becomes dirty. This method minimizes the risk of damaging the paint, ensuring a clean and swirl-free finish. It’s a fundamental technique for any detailing enthusiast.
Applying Car Wash Soap
Selecting the right car wash soap is crucial; avoid household detergents, as they can strip wax and damage paint. Opt for a pH-neutral formula specifically designed for automotive finishes. Once your vehicle is pre-washed and rinsed, it’s time to apply the soap.
Following the two-bucket wash method, dip your clean microfiber wash mitt into the soapy water. Gently apply the soap to the vehicle’s surface, working in straight lines rather than circular motions. This minimizes the potential for swirl marks.
Ensure even coverage, allowing the soap to dwell for a short period (as per the product instructions) to loosen dirt and grime. Avoid letting the soap dry on the surface, as this can cause spotting. Rinse thoroughly, preparing for the drying stage.
Rinsing and Drying Techniques
Thorough rinsing is paramount after washing to remove all soap residue. Utilize a clean water source and a strong spray nozzle, ensuring every surface is free of suds. Lingering soap can cause water spots, diminishing the shine. After rinsing, immediate drying is essential to prevent these spots.
Employ high-quality microfiber drying towels – these are soft, absorbent, and minimize the risk of scratching. Gently pat or blot the surface, avoiding dragging the towel across the paint. Alternatively, a leaf blower (used carefully) can assist in removing water from crevices.
Consider a drying aid, a spray-on product that lubricates the surface and enhances drying efficiency. Proper rinsing and drying are vital steps in achieving a spotless, showroom-worthy finish.
Interior Detailing: Creating a Showroom Finish
Interior detailing revitalizes your car’s cabin, focusing on deep cleaning and restoration for a pristine, comfortable space.
Vacuuming, cleaning surfaces, and conditioning materials create a fresh, inviting atmosphere, enhancing the driving experience.
Vacuuming and Mat Removal
Beginning the interior detailing process necessitates a thorough vacuuming to eliminate loose dirt, debris, and particles accumulated throughout the vehicle’s cabin.
Prior to vacuuming, remove all floor mats – rubber, carpeted, or otherwise – to allow access to the underlying carpeting and facilitate a comprehensive clean.
Utilize a powerful vacuum cleaner equipped with various attachments, including a crevice tool for reaching tight spaces between seats and along the console.
Pay close attention to areas prone to collecting debris, such as under the seats, along the door sills, and within the trunk or cargo area.
Employ a brush attachment to gently agitate carpet fibers, loosening embedded dirt before vacuuming. For heavily soiled areas, consider a pre-treatment with a carpet cleaner before vacuuming.
Once the carpeting is thoroughly vacuumed, clean the floor mats separately, using appropriate cleaning solutions based on their material composition.
Allow the mats to completely dry before reinstalling them, ensuring a fresh and clean interior environment.
Dashboard and Console Cleaning
Cleaning the dashboard and console requires a delicate approach to avoid damaging sensitive surfaces. Begin by dusting these areas with a microfiber cloth to remove loose particles.
Next, apply an interior detailing spray specifically formulated for automotive plastics and vinyl. Avoid products containing harsh chemicals or abrasives, which can cause discoloration or cracking.
Spray the detailing product onto a clean microfiber cloth, rather than directly onto the dashboard, to prevent overspray and streaking.
Gently wipe down all surfaces, including the dashboard, console, door panels, and steering wheel, using circular motions. Pay attention to crevices and textured areas where dirt tends to accumulate.
For stubborn grime or sticky residue, use a soft-bristled brush to gently agitate the area before wiping clean. Follow up with a dry microfiber cloth to buff the surfaces to a shine.
Protect the dashboard from UV damage by applying a UV protectant after cleaning, preserving its appearance and preventing fading.
Upholstery and Carpet Cleaning
Upholstery and carpet cleaning demands specialized techniques based on the material type – fabric, leather, or vinyl. Begin by thoroughly vacuuming the entire interior, including seats, carpets, and floor mats, to remove loose dirt and debris.
For fabric upholstery, use an upholstery cleaner designed for automotive use. Test the cleaner in an inconspicuous area first to ensure colorfastness. Apply the cleaner sparingly and agitate gently with a soft brush.
Blot the area with a clean microfiber cloth, working from the outside in to prevent spreading stains. For leather upholstery, use a leather cleaner and conditioner to nourish and protect the material.
Carpet stains require targeted treatment with a carpet stain remover. Follow the product instructions carefully and blot, don’t rub, to avoid damaging the fibers.
After cleaning, allow the upholstery and carpets to dry completely before using the vehicle. Consider using a wet/dry vacuum to expedite the drying process.
Window and Mirror Cleaning
Window and mirror cleaning is crucial for visibility and contributes significantly to the overall clean aesthetic of the vehicle. Begin by vacuuming any loose debris from the window sills and edges.
Use a dedicated automotive glass cleaner, avoiding ammonia-based products as they can damage tint films. Spray the cleaner onto a clean microfiber cloth, not directly onto the glass, to prevent overspray.
Wipe the glass in overlapping motions, working from top to bottom. Use a separate, dry microfiber cloth to buff the glass to a streak-free shine. Pay attention to corners and edges, ensuring complete coverage.
For exterior windows, consider using a clay bar to remove stubborn contaminants like tree sap and bug splatter before cleaning.
Clean both the interior and exterior surfaces of all windows and mirrors, including the rear window and side mirrors, for optimal clarity and safety.

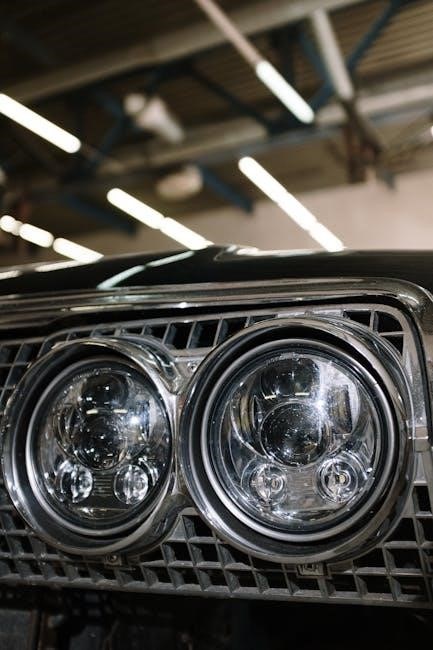
Paint Correction and Protection
Paint correction revitalizes your car’s finish, removing imperfections like scratches and swirl marks. Following correction, protection—waxing or sealing—shields against future damage.
This dual process restores gloss and preserves the paint’s integrity, ensuring a long-lasting, showroom-quality appearance.
Identifying Paint Defects
Before embarking on paint correction, a thorough inspection is crucial to identify all existing defects. Common issues include swirl marks, often appearing as fine, circular scratches caused by improper washing techniques.
Rinsing and drying can also contribute to water spots, etching, and oxidation, manifesting as dullness or discoloration. Deeper scratches, potentially reaching the primer or even the metal, require more aggressive correction methods.
To effectively identify these defects, work in a well-lit environment, ideally with direct sunlight or specialized detailing lights. These lights reveal imperfections invisible to the naked eye.
Clay bar treatment can help reveal bonded contaminants that contribute to a rough paint surface. Carefully assess the severity and extent of each defect to determine the appropriate polishing compound and technique for optimal results. Proper defect identification is the foundation of successful paint correction.
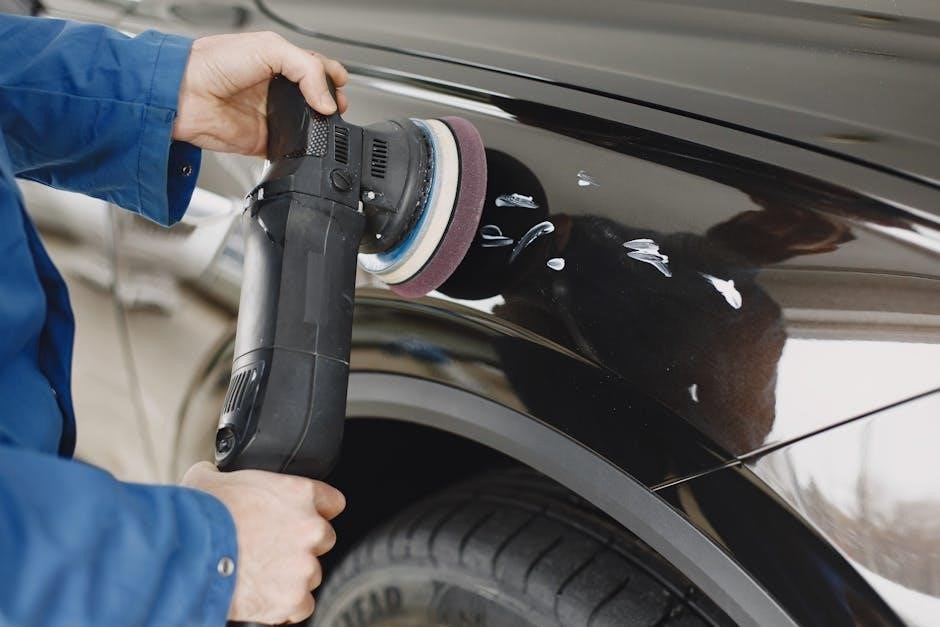
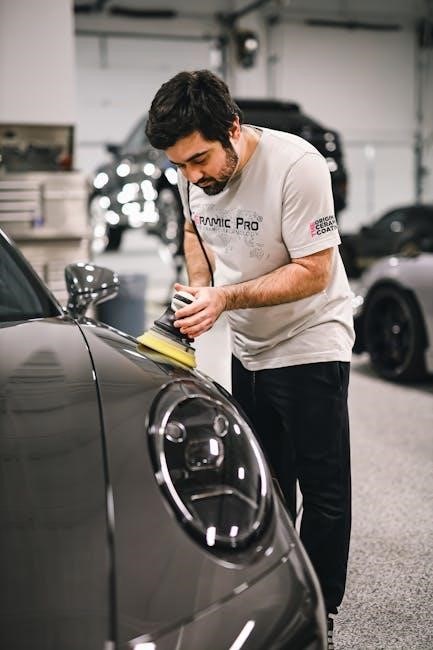
Polishing and Compound Application
Polishing and compounding are core steps in paint correction, removing defects and restoring gloss. Compounds are abrasive, tackling deeper scratches and oxidation, while polishes refine the finish, eliminating swirl marks and enhancing clarity.
Application typically involves a dual-action (DA) polisher or rotary polisher, paired with appropriate pads – cutting pads for compounds, polishing pads for polishes. Always work in small sections, applying moderate pressure and overlapping passes.
Begin with the least aggressive combination (softest pad, finest polish) and increase intensity only if necessary. Monitor the paint closely, checking for heat buildup and ensuring even removal of defects.
Proper technique is vital; avoid dwelling in one spot and maintain consistent speed and pressure. After each pass, wipe away residue with a clean microfiber towel to assess progress and prevent re-introducing contaminants.
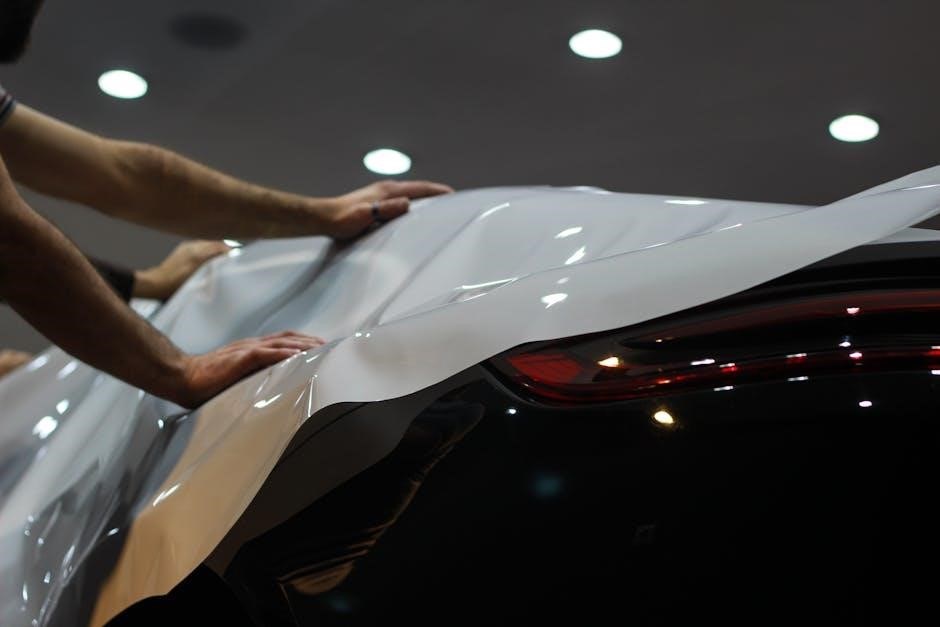
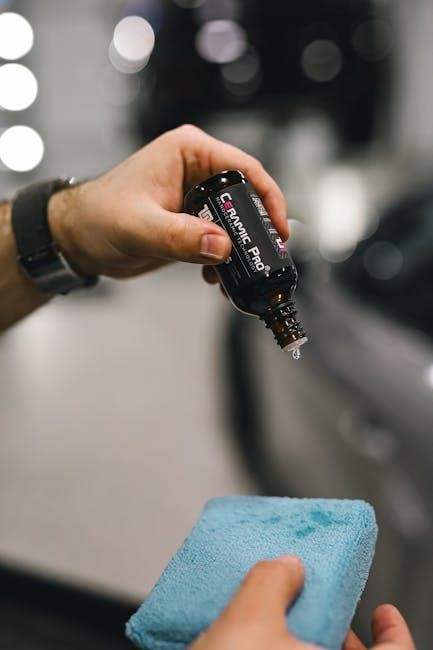
Waxing and Sealing
Waxing and sealing are crucial final steps, protecting the corrected paint and maximizing gloss. Waxes, traditionally carnauba-based, offer a warm, deep shine but require more frequent application. Sealants, synthetic polymers, provide longer-lasting protection against UV rays, chemicals, and environmental contaminants.
Application is typically done by hand or machine, using a foam applicator pad. Apply a thin, even coat, working in straight lines or circular motions. Allow the product to haze according to the manufacturer’s instructions before buffing off with a clean microfiber towel.
Multiple thin coats are preferable to one thick coat, enhancing durability and reducing streaking. Consider layering a sealant over a wax for combined benefits – the warmth of wax with the longevity of a sealant.
Regular waxing or sealing maintains the paint’s health and appearance, preventing oxidation and preserving the investment in paint correction.
Advanced Detailing Techniques
Elevated detailing involves specialized processes like clay bar treatments to remove bonded contaminants and minor scratch repair for paint rejuvenation.
These techniques demand expertise and precision, restoring vehicles to pristine condition beyond standard cleaning and protection methods.
Clay Bar Treatment
A clay bar treatment is a crucial step in advanced detailing, effectively removing embedded contaminants that washing alone cannot eliminate. These contaminants, such as industrial fallout, brake dust, and overspray, create a rough surface texture, diminishing paint gloss and preventing wax adhesion.
The process involves using a specialized clay bar, lubricated with detailing spray, to gently glide across the vehicle’s paint. The clay’s adhesive properties lift and trap these bonded impurities, leaving a remarkably smooth surface.
Prior to claying, ensure the vehicle is thoroughly washed and decontaminated. After the treatment, polishing is often recommended to further refine the paint and restore its brilliance. Proper technique and clay bar selection are vital to avoid marring the finish. Regularly using a clay bar maintains a pristine canvas for optimal wax and sealant performance, enhancing long-term paint protection.
Scratch Repair Basics
Addressing scratches is a common concern for vehicle owners, ranging from minor swirl marks to deeper imperfections. Understanding scratch types is key – clear coat scratches are often repairable, while those reaching the paint base require more extensive work. For light scratches, polishing compounds can effectively level the clear coat, diminishing their visibility.
Applying the compound with a polishing pad and machine polisher yields the best results, though hand application is possible for smaller areas. Deeper scratches may necessitate the use of a cutting compound followed by a polishing compound to refine the finish.
Always test products in an inconspicuous area first. After scratch repair, protect the area with wax or sealant. For significant damage, professional repair is recommended to ensure a flawless, lasting result and prevent further deterioration.
Essential Detailing Tools and Products
A well-equipped detailing arsenal is crucial for achieving professional results. Core tools include microfiber towels – essential for various tasks, avoiding scratches. A quality wash mitt, two buckets (one for soap, one for rinse), and a foam cannon elevate the washing process. For polishing, a dual-action polisher, polishing pads, and compounds are vital.
Chemicals encompass car wash soap, wheel cleaner, interior detailer, glass cleaner, wax, and sealant. Clay bars remove bonded contaminants. Vacuum cleaners with attachments tackle interior debris. Brushes of varying sizes aid in cleaning vents and crevices.
Investing in quality products ensures effective cleaning and protection. Consider specialized tools like trim restorers and tire shine applicators for a comprehensive finish. Proper storage and maintenance of tools prolong their lifespan and performance.